Monday, May 24, 2010

Pepper Steak... I've got this covered!


Pepper Steak.  I got an email today from one of my favorite followers… (ok you’re all my favorites…) but she asked me for a recipe for pepper steak and was sure I’d be a lifesaver and have one for her.  So as not to let her down, I immediately wrote her back and said “NO PROBLEM! I GOT THIS COVERED!”

So I started going through all of my recipes, cook books, magazines, the dusty memory, as not to let her down and found out that I have about 17 different recipes for Pepper Steak and none of them are the same!   There’s traditional, there’s au poivre, there’s Chinese, there’s Hungarian… you get where I’m going with this!  There’s a lot!  So what’s a girl to do… well, I’ll tell ya what I did… I’m going with my old faithful, easy tried and true delicious recipe that I got from… you guessed it… MOM!

We probably ate this a couple times a month and let me tell you, no one made it like my mom… well until I started to that is… I’ve varied it a bit from how she used to make it, but it’s simply delicious and some pretty darn good Pepper Steak if I do say so myself! 

So this one’s for you Toni… thank you for following and I hope this recipe replaces the one you misplaced! 

Pepper Steak

1 ½ lbs beef top round steak or flank steak (I use flank)
2 teaspoons olive oil
1 medium onion, sliced thin
2 cloves garlic, minced
1 cup chicken broth
¼ cup soy sauce
1 tablespoon heavy cream
½ teaspoon black pepper
½ teaspoon black peppercorns
1 teaspoon Worcestershire sauce
1 teaspoon butter
1 red bell pepper, sliced into thin strips
1 green bell pepper, sliced into thin strips
2 whole tomatoes, petite diced
2 celery stalks, diced
1 tablespoon cornstarch
1/3 cup cold water

Slice the beef into strips on an angle- about 2- 3 inches- (it might help if the beef is slightly frozen to slice easier)

In a large skillet heat olive oil and add the peppers and the onion and sauté for about 5 minutes or until the onion is soft and translucent.  Add the garlic and celery and continue to sauté for another 2 minutes on medium heat.

Remove from skillet and set aside. 

Add beef and cook until brown… a little caramelization is ok on the beef.  Remove and set aside. 

Add chicken broth, soy sauce, pepper, peppercorns, Worcestershire, butter and heavy cream and make sure to scrape up all the goodies from the bottom of the pan.  Cook for about 5 minutes and add beef and pepper mixture.  Cover and cook for about 15-20 minutes. 

In a small bowl combine the cornstarch with the water and stir into the pan stirring until the sauce thickens… should a take minute or two.

Serve over butter rice… spooning the sauce over the top. 

Sunday, May 23, 2010

Michelle's BBQ Marinade

Michelle's Marinade:
1 bunch of curly or flat leaf parsley 
4-6 cloves of garlic 
1 whole or 1/2 large onion 
1 whole green bell pepper 
1/2 red bell pepper
1 tbs red pepper flakes
1 tbs garlic powder
1/4 cup white vinegar
1/2 cup oil (can use olive oil, canola, corn)salt & pepper 

OPTIONAL:Fresh Cilantro, Fresh Rosemary, Fresh Jalepenos Wash and roughly chop parsley, peppers, onion and other fresh herbs. 

Put all ingredients into the blender and pulse until everything is emulsified. Pulse to desired consistency. I usually blend it into a puree.

Pour onto your meat, fish or chicken and marinate for at least an hour. The longer you marinate it the more intense the flavor will be. Can marinate overnight for best flavor.

Tuesday, May 18, 2010

Italiano Heaven Manicotti


When I was a kid and we’d go to an Italian Restaurant… my staple dish that I ordered with out fail was always Manicotti.  It didn’t matter how many other delicious things there were on the menu, all I wanted was Manicotti. 

Those delicious little tubes of al dente pasta filled with soft creamy ricotta cheese & spinach topped with a light pink cream sauce… truly my idea of Italiano heaven!

Well my life seems to have come full circle, because my oldest boy follows in his mama’s footsteps!  Manicotti is now his all time fave and I aim to please!  So here is my family recipe for Manicotti that’s sure to become a favorite in your home!

Manicotti

1 Box Manicotti Shells
-cook according to directions on the box

Cheese & Spinach Filling
1 Container Ricotta Cheese
½ Package Frozen Chopped Spinach (thawed & drained)
1 clove of garlic minced
1 egg
2 Tablespoons Fresh Basil (finely sliced)
1 Teaspoon Garlic Salt
½ Cup Shredded Mozzarella Cheese

Sauce
1 Can Tomato Sauce or Puree
1 Teaspoon Butter
½ Cup Light Cream
2 Tablespoons Light Extra Virgin Olive Oil
2 Cloves of Garlic
½ Onion
3 or 4 big leaves of Fresh Basil
Salt & Pepper to taste

4 Slices of Mozzarella sliced in half

In a large bowl combine all ingredients for the Cheese & Spinach Filling.  Spoon into a large Ziplock bag and cut a corner off of the bottom… this way you can use it as a piping bag… (fun trick)  Place in refrigerator.

Combine all ingredients for the sauce and simmer for 10 minutes.  Remove onion, garlic cloves, & basil.

Pipe cheese mixture into each manicotti shell.  Fill one end, then fill the other… don’t try to fill the whole thing in one pipe… it won’t work and your shell will tear in half. 
Arrange in a single layer in a pyrex dish or casserole dish that’s been sprayed with non stick spray or a drizzle of olive oil. 

Spoon over the top a few spoonfuls of the pink sauce over the center of each filled Manicotti shell. 

Cover with aluminum foil and and bake in a 350 degree oven for 45 minutes.  Remove foil and add slices of mozzarella cheese on top of the Manicotti and put back in the oven for an addition 5-10 minutes until the cheese is ooey gooey and melted on top! 

Heirloom Tomatoes


Heirloom Tomatoes

When I think of summertime vegetables one of the first things that comes to mind is tomatoes.  Sure you can buy them year round in your local market… but nothing and I mean nothing is like a ripe rich robust tomato when it’s in season!

So what is an heirloom tomato?  An heirloom tomato is generally considered to be a tomato whose seeds have been passed on from several generations.

When looking for heirloom tomatoes to make this salad, don’t be so concerned with the exact variety, rather what you can find from your local farmer’s market that’s in season.

  
Salad of heirloom tomatoes,
ricotta salata cheese & watercress

4 different varieties of heirloom tomatoes.
  Green zebra. Cherokee purple. Cherry belle. Yellow pear.
1 bunch of fresh watercress
½ purple onion
¼ pound fresh ricotta salata cheese
2 tablespoons extra virgin olive oil
3 tablespoons aged balsamic vinegar
½ teaspoon Dijon mustard
salt & pepper to taste

Wash & quarter all of the tomatoes.
Finely slice the onion.
Wash & dry very well the watercress.


In a separate small bowl, combine the olive oil, balsamic, mustard, salt & pepper.  Mix until it’s emulsified.

Pour over all ingredients and toss well.

Crumble the ricotta salata cheese over the top of the salad.  Serve chilled


Thursday, May 6, 2010

Chicken Parmegiano with out the guilt!


Whenever I think comfort food, I usually think... heavy, fattening, deep fried, and guilty guilty guilty!!!  Well, this recipe for Chicken Parm is not only delicious comfort food but leaves you feeling un-guilty!  It's a light fresh and easy version of this classic dish that won't have you feeling bad you went back for seconds!  

Typically the chicken in chicken parm is fried... well I go another route... I bake my chicken.  It comes out just as crispy, light & moist as the traditional one! 

I serve it on a small bed of spaghetti rigate and arugula...It also takes half the time and even better... half the mess! 

Guilt Free Chicken Parmigiano 

4 Boneless Skinless Chicken Breasts Pounded Thin
1 Cup Bread Crumbs Seasoned
Salt & Pepper

1 Egg
1/4 Cup Milk

Sauce
1 Can Tomato Puree
2 Whole Garlic Cloves
3-4 Fresh Basil Leaves
3 Tbs. Heavy Cream
Salt & Pepper
A Pat of Butter (optional) 

4 Slices of Mozzarella

Beat the egg & milk together in a deep dish or even a plastic zip lock bag.  Drop in the chicken and cover with the mixture.  In a sheet pan, cover it with bread crumbs and coat both sides of the chicken evenly.   Place into a pyrex dish that has been sprayed with non- stick spray.  Place in the oven on 425 uncovered for 20-30 minutes depending on the thickness of the chicken breast. 

In a sauce pan combine all the ingredients for the sauce and allow to simmer for 10 minutes.  

Remove Chicken from the oven and spoon 2-3 tbs of sauce in the center of the chicken (which should be perfectly golden brown and crispy) and top with a slice of mozzarella cheese.   Place under the broiler for a minute or two until it's all nice and melted... I like mine a little toasty! 

Serve over some spaghetti that you've topped with some more sauce and fresh arugula! YUM! 

Chicken Parmegiano in a flash! 


Tuesday, May 4, 2010

Taquitos... Beef or Chicken


Hola Amigos!  Happy Cinco de Mayo~  In true form of a celebration of this caliber I'd like to share a muy rico recipe for shredded beef & shredded chicken taquitos.    These taquitos or "little tacos" are as authentic as they can be and  are muy delicioso too!  They've got that great crunch on the outside from the corn tortilla that's been lightly fried and the inside is oh so tender and savory!  They're great for an appetizer for a party or even on their own for dinner... alright, truth be told... I freeze them after I've made them and pop them in the oven for a late night snack!  

So vamos! Make some taquitos tonight! 

Let me also say one thing.... I'm always honest with you guys...so I will say this...  this isn't an in and out of the kitchen kinda recipe... this definitely requires a bit of commitment in terms of time in the kitchen, it's a lot of steps (nothing hard!) but it takes time... you really won't be sorry though!   Truly you'll feel better than you didn't go the frozen taquito from the freezer section in the supermarket route... gosh only knows what's inside of those things!  

Shredded Beef & Shredded Chicken Taquitos


Shredded Beef & Chicken both have the same ingredients-

1-3 lbs of round roast or tri tip roast untrimmed
or if using chicken 2 lbs of boneless skiness chicken thighs 
1/2 red bell pepper
3-5 green scallions
4-5 cloves of garlic
2 tbs cilantro
1 tbs salt

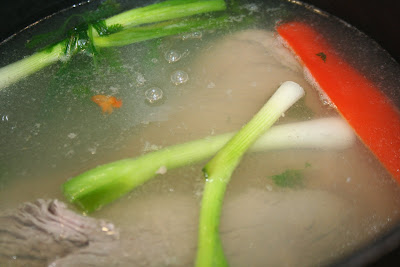
Place meat or chicken in a deep pot and add enough water to cover it.  Add all ingredients.  Allow to boil for 1 hour.  


Turn off flame and allow meat or chicken to cool completely.  Remove from the pot and place on a cutting board, reserving the broth as you can use this flavorful stuff for a great soup or sauce for something else!  Begin shredding meat or chicken into thin little pieces....also chop or smoosh with the back of your fork the pepper and scallion and add to the shredded meat/chicken mixture.  I also like to add some extra fresh chopped scallion to it!  Combine throughly in a bowl.  Add 1/2 can of chopped chiles to it... a little more salt & pepper to taste.   You can even add a drained can of petite dice tomatoes in it as well if you like. 

Shredded Chicken


Shredded Beef

Begin assembling!  I happen to like the really small corn tortillas.  If you can find them any size will do.  

I also like to put my tortillas in the microwave for about 30 seconds so that they become soft and are easier to work with once you put the filling in and roll them up... that way they won't crack on you. 


Place a small amount of filling at the base of the tortilla.... then roll it up like a cigar.  If you find that yours have a hard time staying together once you drop them into the oil to fry them, use a little toothpick to hold it closed and remove it as soon as it comes out of the hot oil. 


Shredded Chicken


Shredded Beef


Fry on each side until it's golden brown.  Serve with sour cream, guacamole, salsa, etc... 

**sidenote**

This filling is also fantastic if you have any left over with some shredded lettuce and made into a little tostada type of salad.  Chop some fresh tomatoes, some more cilantro and you've got another meal!  
You can also add a can of chopped tomatoes, juice and all to it and then serve it over some rice.   

Adios Amigos!