Sunday, January 31, 2010

Oui! Oui! Oui! Steak au Poivre et Pomme Frites! Steak & Fries Baby!!!


Oui, Oui, Oui!

I am inspired! I went to a wonderful French restaurantlast night with some good friends and ate a dish that I haven’t had in ages and forgot just how much I love French food! Steak au Poivre avec Pomme Frites…. Yes, yes, yes, I know you’re going to say well that’s just steak and french fries, but no it’s not. It’s so complex and has such amazing flavor, yet it’s ingredients are so basic and common… and to me, that’s the beauty of French cuisine.

For most people in the kitchen, when they think of French food an automatic thought of difficulty and intimidation will come to their minds. Yes, it’s true, there are many dishes in French cuisine that can certainly require a certain amount of skill in the kitchen, but I can assure you, this dish is one that’s not that.

I’m also going to say one more thing… ha ha ha… as if I don’t say enough!

Pomme Frites.... you’re all gonna raise an eyebrow at me now and say Michelle! Tell me you aren’t going to try to teach us how to make French Fries! Well, my answer to that is Oui! Oui! Oui! Oui! This isn’t just any french fry recipe! This is THE french fry recipe! And I can almost assure you that once you try your fries this way… you’ll never eat them any other way! There’s a little secret ingredient added to them! Read below!

Dip them the sauce from the Steak au Poivre! C’est manifique!!!!!

Steak Au Poivre

4 Filet Mignon (6 to 8 oz each)

3 Tablespoons Butter

½ cup cream

3 Tablespoons Mixed Black & Green Pepper Corns

slightly crushed

3 Tablespoons Vegetable Oil

4 Tablespoons Cognac

Salt & Pepper to taste

About 30 minutes before cooking, remove the filets fromthe refrigerator and pat them dry with a cloth. Coarsely grind the pepper corns in a kitchen mortar with a pestle or in a peppermill and spread them on a plate. Coat the filets on both sides with the pepper.

Melt butter (and/or olive oil) in a heavy cast iron skillet with a long handle. When very hot, add the

filets and sear the meat for approximately 3-4 minutes on both sides.

Remove skillet from the heat, transfer the filets to a platter or plate, then pour out excess fat. 


Do not wash or remove ingredients in skillet, you will be deglazing the pan.

Return filets to pan and add cognac over filets.

Allow Cognac to cook down for a minute- (if you

feel comfortable enough, you can flambé this… but it’s not essential if you don’t!)

Add cream to the skillet and allow to simmer for a minute and thicken into a gorgeous pepper sauce!

Pomme Frites

4-6 Large Russet Potatoes Squared off at the ends to make sure that you have even uniform pieces. Cut into ¼ inch by ¼ inch fries or battonettes.

Rinse the cut potatoes in COLD water to get rid of the excess starch that will prevent them from sticking together.

Thoroughly dry fries on some kitchen towels-

Here’s the secret ingredient! CORNSTARCH! Coat the fries in cornstarch to guarantee a crispy crust on the outside!

Transfer potatoes to a wire rack and allow them to set for about 10 minutes

Use enough oil to cover all of the fries and then some- the more room the fries have in the oil, the less the temperature will drop when they are added. heat oil to a temp of 350 degrees

Cook in oil until they turn that perfect golden brown, making sure to move them around in there quite a bit while they cook. Remove from oil and place on wire rack lined with paper towels to absorb excess oil.

Season with coarse salt (kosher salt) immediately upon removal from oil, while they are still hot.


**sidenotes**

Make sure you pat your filets down to remove any excess moistutre. This step is important because if you don’t do this, your meat won’t brown.

Pomme Frites tip- use oil with a high smoke temperature, i.e. peanut oil

If you want to go the extra mile with your Pomme Frites, you can twice fry them. The first time cook in oil at 325 degrees, just until they go from that white color to a light golden yellow color…. Remove them and pat them off leaving all excess oil behind and put them back in the oil at 375 degrees and fry until crispy and deep golden brown.

Thursday, January 28, 2010

Rustic Delicate Sophistication & Class... Uh huh that's right Smoked Salmon Appetizer


I'm not gonna lie guys, I'm a little wiped out at the end of this week... it seems like it's gone on forever! But I made these last night for that party that I went to and they were a real hit. I really wanted to share it with you before the weekend, in case you might be entertaining!

Either you love smoked salmon or you don't... there's no in between.... that is, until you try this recipe. It's so subtle and doesn't taste overwhelming or fishy at all! This one has something for everyone... it's got some rustic, some delicate, some sophistication and class.... no, I'm not talking about me...yet another bad joke... I think my fatigue makes the jokes worse! Alright, moving on! Back to the recipe!

By the way, there's a lot of varieties of Smoked Salmon out there... there's Lox, Nova, Sockeye , Pink, Atlantic or Scottish. I happen to be a huge fan of a company that makes amazing Smoked Salmon from Scotland. They are called St. James. They're salmon has such a woodsey, rich nutty flavor and it really is top quality. If you can find it in the store, really it's worth buying. (I wouldn't push something I didn't totally believe in!)

Enjoy this Smoked Salmon on Crostini Appetizer recipe!

1 Loaf French Bread Sliced on the Diagonal
2 Tbs Olive Oil
1 Package Whipped Cream Cheese
1/2 Cup Ricotta Cheese
2 Tsp Lemon Juice
2 Tbs Chopped Dill
1 Tbs Chopped Chives
Salt & Pepper
1 Large Cucumber Small Dice


Brush French Bread slices with olive oil and put in the oven on 400 degrees for 7-10 minutes, checking on them a few times and flipping them over 1/2 way through- let them turn a golden brown. Remove from the oven and allow them to cool.
In a bowl combine Cream Cheese, Ricotta Cheese, Lemon Juice, Dill & Chives, salt & pepper to taste. Mix well. Put in refrigerator for 10 minutes and allow to set.
Assembly:

Spread a small amount of Cream Cheese mix over the crostini
Place diced cucumbers over the spread
Top with Smoked Salmon sliced into strips and a dill sprig

The smoked salmon I was talking about is from this company... www.stjamessmokehouse.com


Tomato Chive & Goat Cheese Surprise!


I'm gonna keep this one real simple today just like this recipe... 3 ingredients...
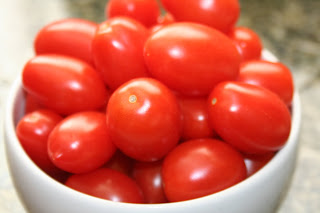
Goat Cheese, Cherry Tomatoes, Chives. A perfect balance of flavors combining the tartness from the goat cheese, the sweet from the tomatoes and the spice and savory from the chives.

This is an appetizer that your guests are going to absolutely LOVE and they'll be popping 3, 4, 5, of them in their mouths in a row! Trust me I know... I made these for a party that I went to last night and I watched the guests to just that! The best part about it is the surprised look on their faces they have when they bite into them, they aren't expecting it to be a tomato! With Super Bowl Sunday around the corner, this is a quick, easy impressive appetizer!

These small bites have BIG impact!
Here's a step by step....

1 package cherry tomatoes
1 log goat cheese
1/2 cup chopped chives

yes... it's that simple.


Spread cheese around to coat the entire tomato

Use your palm to smooth it out.

Roll around in the chopped Chives (or any other herb, i.e. dill, parsley, basil, cilantro)


Tuesday, January 26, 2010

The Stuffed Funghi

The Stuffed Funghi


Chanterelle, Crimini, Shitake, Enoki, Portabella, Porcini and good ol’ button. White or brown, earthy, rich full bodied, or delicate and velvety… shrooms. mushies, MUSHROOMS! I love them in any form, I’ll eat them whatever color they are or however you choose to call them!

You know why they invited the mushroom to the party? Cause they’re Fun-ghi! You know why it left the party? There wasn't MUSH-ROOM! ha ha ha... Ok, I’ll stop with the bad jokes and get straight to the point! (you guys know I can't resist!)

Stuffed Mushrooms. There are a ton of recipes out there for what you can stuff them with. Sausages, Crab meat, Bread crumbs, Spinach, Rice, Cheese… it’s endless really! But this one happens to be a favorite of a dear friend of mine! I’m going to call them

Laura’s Suffed Mushrooms!

It has the perfect balance of rich and tangy and savory and they truly make for an excellent appetizer!

They’re easy to make and will make your guests think you slaved over them forever! They’re tasty little morsels that will have them hounding you for more!


Laura’s Stuffed Mushrooms

10 Large Button Mushrooms

1 Tablespoon of Butter

2 Teaspoons of Olive Oil

¼ Onion or 1 Shallot Finely Diced

1/3 of a cup of Sun Dried Tomatoes chopped

1 log of Goat Cheese

½ Teaspoon Cayenne

½ Teaspoon paprika

2 tablespoons fresh parsely, finely chopped

Soak the sun-dried tomatoes in hot water for 20 minutes. Chop the soaked tomatoes into small bits and set aside.

Wipe the mushrooms with a damp cloth. Carefully scoop out the stems using a knife and small spoon. Chop the stems into very fine bits and set aside.

Heat the butter in a large frying pan over medium high heat. When hot, add the mushroom caps to the pan and saute them for a few minutes, flipping often, until they begin to brown. Remove from pan and again set aside.

Reduce the heat to medium, add the olive oil to the pan and then toss in the shallot or onion . Stir and fry for a minute or two, and then add the chopped

stems.

Saute, stirring frequently, for about five minutes. Now add the sun-dried tomatoes, cayenne, paprika, parsley, salt and pepper. Cook for another minute and transfer the mixture to a small bowl. Stir in the goat cheese and olives and stir until everything is well combined.

Spoon about 1-2 tsp of the filling into the cleaned mushroom caps.

Coat the bottom of a baking pan with a bit of olive oil. Transfer the stuffed mushrooms to the pan. Bake in a preheat 350 degree oven for roughly 10 minutes. Garnish with a bit of fresh parsley if desired.


Please keep sending me your stories & recipe ideas!


Monday, January 25, 2010

OPA! Spanakopita!


OPA! SPANAKOPITA!!!


Being of Armenian descent I've grown up with some sort of version of a Spanakopita on our dinner table alot! There's just something about that crispy phyllo dough, that hot smooth spinach and tangy feta cheese when you bite into it that just puts it on my all time favorites list!
I'm not kidding. It's that good.
It takes a little practice and trial and error to make but once you get it... you get it!!! You'll find over time, they're easy and a fantastic appetizer for a party, side dish for with your dinner, or just a good snack for yourself! It's what I like to call, old faithful! It'll be a crowd pleaser for sure!
So let's talk Phyllo dough...
QUE OMINOUS MUSIC! DUM DUM DUMMMM!!!!!!
I'm kidding!!! It's not so hard to use!
Phyllo dough can be one of those things that when you think about getting in the kitchen to bake with, the red lights and big whistles start popping into your head... andall parts of your brain will tell you... STEP AWAY FROM THE PHYLLO!
It's delicate, it cracks easily and can't be left unattended for too long... sounds like a woman right? (I know, I'm so corny with my jokes!)
I'm going to tell you this... love the Phyllo and the Phyllo dough will love you back!
With that being said... let's get started on making some of the most delicious and easy Spanakopita's!
Please take a look at the **sidenotes** at the end for more tips for working with phyllo dough.
SPANAKOPITA
The Filling:
1 small finely diced onion
2 tablespoons butter
2 packages (10 oz) chopped spinach thawed & pressed dry
2 large eggs beaten
½ pound feta cheese
(about 1 ½ cups)
¼ cup fresh flat leaf parsley chopped
2 tablespoons fresh chopped dill
1 teaspoon salt
¼ teaspoon ground black pepper
The Shell:
1 ½ sticks butter melted and clarified
1 package Phyllo Dough
Dough:
Slice the phyllo into strips. Generally you can get about 3 large strips lengthwise and then stack them- and for use, peel each layer off one by one…
Cover with wax paper and then a moist towel. If dough gets too wet or dry, it will be unworkable, but it's not difficult once you get used to it.

Filling:
In a large deep skillet sauté the onion in butter over medium heat until
translucent. Add the spinach and cover and cook for 2 minutes.
Allow to cool.
In a bowl, combine the eggs, cheese, parsley, dill, salt & pepper. Add cooled spinach mixture &combine thoroughly.


Assembly:
Brush 1 strip of the phyllo dough with melted butter (be generous with the
butter) Put a teaspoon of filling at 1 end of the phyllo dough. Fold into triangles and continue to fold triangle
over and over to end of phyllo strip. Brush the top
with melted butter. Repeat this process for each strip. Bake in a 350F oven for 20 minutes, until golden brown.


**sidenotes**
Optional things you can do-
Beat 1 egg and 1 tbs water and brush over the top of the triangles before they go into the oven. This will make for an even better golden brown and less cracking of the phyllo dough.
Ricotta Cheese is also another variation that you can add to the mixture, it will make for a creamier filling.
Dill is not the only herb you can use, try oregano or a little crushed mint! For a little bit of spice you can add some cayenne pepper. For some tangy-ness add some lemon juice! It’s all dependent upon your taste! Remember, when it’s your kitchen, you can do what you want! Be fearless!
Speaking of fearless….
Fear not the Phyllo Dough!

You can purchase phyllo dough sheets frozen and they are found in most supermarkets. Buy the freshest frozen dough if possible. If your grocer doesn’t sell a lot of this, you may be buying a package that’s been sitting around for a while. Phyllo dough that’s not fresh will crack and crumble and be almost impossible to use.
Plan ahead with Phyllo dough. You will need two damp (not wet) cloths dish towels- you MUST cover the Phyllo dough at all times unless you are taking out a sheet of it… it will dry out SUPER fast and crack on you…. And as we all know Whitney said, crack is wack! (you guys still reading this?)


Thursday, January 21, 2010

Who Dat?


CRAWFISH ÉTOUFFÉE


New Orleans. NOLA. The Big Easy. Paris of the South. Saint City. Mardi Gras. Haunted tours. Jazz Fest. St. Charles Square. I could go on & on!

Plain and simple, I’m gonna say it, by far one of the most amazing cities that this country has to offer. You never think that there is someplace this cool in our country...and unless you’ve been there, let me tell you first hand, you must go there once in your lifetime.

The history, the culture and yes… the restaurants and food! It’s like no other!

I’ve had the pleasure of visiting New Orleans quite a few times with my husband who lived and went to college there for four years… I had the advantage of him being my own private tour guide of the city, taking me to places that only “local’s” knew about with the best food! One

of the dishes that I fell in love with while I was there was Crawfish Etoufee.

It’s a Cajun Classic and this is one of the easiest recipes for it out there! The spices, the crawfish, the incredible mix of flavors...serve it over some hot butter rice and I’m not kidding, it may as well be a Mardi Gras party for anyone that eats it!!!

If you’ve never been to New Orleans, after you eat this, you’ll have a great taste of all that this city has to offer! If you have… please, relive it through this dish and I hope you make it out there soon!

This one is for you Who Dats! Win big this weekend!

Crawfish Etoufee

1 Stick of Butter

1 Large Onion Chopped

1 Cup Celery Chopped

1 Green Bell Pepper Chopped

2 Garlic Cloves Minced

1 Pound Crawfish Tails (or shrimp)

1 Bay Leaf

1 Heaping Tablespoon Flour

¾ Cup Chicken, Vegetable or Shrimp Stock

¼ Cup White Wine

1 Tablespoon Old Bay Seasoning

1 Teaspoon Salt

½ Cup Finely Chopped Green Onions

2 Tablespoons Finely Chopped Parsley

Pinch of Cayenne or A couple Dashes of Tabasco

  • In a mixing bowl combine the rinsed crawfish with the Old Bay Seasoning. Cover with wrap and refrigerate until needed.
  • In a heavy bottomed pot melt the butter and add the onions, celery and bell peppers over medium-high heat. Allow to sauté until they are translucent, about 7 to 10 min. Add the flour and make a roux/mixture out of the vegetables and flour. Cook about 5 more minutes.
  • Add the garlic, bay leaf and begin to whisk in the stock & wine slowly. Once incorporated, add Tabasco or Cayenne and Crawfish or Shrimp.
  • Season with salt, allow to thicken and cook for approx. 20 minutes.
  • Stir in Chopped Parsley & Onions and cook for 2 more minutes.
  • Serve over hot butter rice.

EASY RICE RECIPE:

1 Cup Long Grain White Rice, 2 Cups Chicken Stock, ¾ Sick of Butter, 1 Tablespoon Salt. Add All ingredients to a pot bring to a boil. Reduce heat cover and cook for 20 minutes.

OOOOHHH WEEE!!!!

**side note** If you can’t get a hold of Crawfish Tails, you can use shrimp.

Tuesday, January 19, 2010

Stuff It!


Stuffed Peppers.


Most of us were brought up to think that meat and vegetables were cooked separately… side by side so to speak… but if you grew up in our house being that we were from Armenian descent, veggies stuffed with meat or dolmas as we called them were part of the norm. We stuffed grape leaves, cabbage, eggplant, tomatoes and even peppers.

Stuffing peppers is actually pretty common in a lot of cultures. Hungarians, Greeks, Italians and Armenians all have some sort of variation for this recipe.

The one I’m going to share with you today is an Armenian recipe. You can actually use this recipe to stuff just about any vegetable that you like! It's warm, tasty, savory and delicious!

Red, Green, Yellow… the color of the pepper doesn’t matter! This is one of those no fail type of recipes… go ahead and try… you can’t ruin it!

This one is for you Lelo… thanks for writing to me for the recipe! I know grandma would be proud of you!

Stuffed Peppers

8 Bell Peppers

1 pound ground beef/turkey/chicken

½ cup long grain rice

½ onion finely chopped

¼ cup fresh flat-leaf parsley

1 can peeled, petite dice tomatoes

Juice of 1 lemon

½ teaspoon dried mint crushed

¼ teaspoon cayenne pepper

1 small garlic clove minced

salt & pepper to taste

· Wash the peppers and cut off the tops & remove seeds. Set aside

· Mix the meat, rice, onion, parsley, garlic, cayenne, salt & pepper and half of the can of tomatoes in a large mixing bowl. Combine thoroughly.

· Stuff the cored peppers with meat- do not stuff all the way to the very top. Leave about ¼ of an inch from the top as the rice will expand while cooking and it will overflow.

· Arrange the stuffed peppers in a large pot. Pour the remaining tomatoes over the top. Add the lemon juice, mint and a little water so thereis approx 2-3 inches of liquid in the bottom of the pan.

· Cover and bring to a boil. Reduce heat and allow to simmer, covered, for about 45 min, or until the peppers are tender.

OPTIONAL: You may serve with a dollop of yogurt or Lebni (Armenian style yogurt- it has a thicker consistency than plain yogurt) on the side

Wednesday, January 13, 2010

Not your mother's cinnamon rolls....

This is for one of my favorite people who recently got a Kitchen Aid Mixer for Christmas. She hasn’t really started using it yet and I thought, why not make the first time amazing! Don’t just let those mixers sit up on the counter and collect dust people! USE THEM! You can bake cookies & cakes… make pizza dough & breads… and of course my all time favorite! And it's not all that difficult to use!

One of the best memories that I have from my childhood was Cinnamon Rolls on Saturday mornings….Soft sweet dough, encrusted with delicious layers of cinnamon, sugar & pecans, with that sweet ooey light frosting that melts all over the top of them…. OK! I'm seriously lying right now! My mom did NOT make them from scratch and they did not have layers of ooey ooey-nees oozing out of them, but a girl can dream, right?! Alright, so the one’s I had growing up were a little more simple than that… you know the one’s your mom would buy at the supermarket that came in the aluminum tube that would POP! open as soon as you peeled off the wrapper… and then at the end was this little plastic cup looking thing that had a pastey looking "i think this is supposed to be frosting?" topping inside that looked like it would be better to use for an arts and crafts project as glue than as frosting! Yes… well, I’m guilty! I loved them and ate as many as I could when my mom would make them.

Well, thank goodness I love to cook! I don't even look at those in the supermarket and I actually think I might turn a blind eye to the entire refrigerated section because of them!

Start rejoicing! Because these are not your mom’s cinnamon rolls! These rolls are serious business! Now I’m not gonna lie, they aren’t as easy as the old POP! out of the aluminum tube but the hard work will pay off and it’s so delicious, your family will thank you!

Dee, this one’s for you! Enjoy the new Kitchen Aid Mixer!

Cinnamon Rolls


Dough

3 cups all-purpose flour

¼ granulated sugar
1 tsp salt

1 tbsp active dry yeast

¼ cup warm whole milk

3 eggs

¾ cup unsalted butter, cut in 12 pieces

Cinnamon Butter

1 cup light brown sugar

¼ cup all-purpose flour

2 ¼ tsp ground cinnamon
Pinch of Salt

½ cup unsalted butter, softened

¾ cup pecan halves, toasted and coarsely ground

Glaze

1 ½
cups confectioner’s sugar

3 tbsp whipping cream

Prepare Dough:

In medium bowl, combine flour, sugar and salt. In mixer bowl, stir yeast and milk. Let stand about 5 mins. Add eggs. Attach flat beater, set to Stir and mix. Increase to Speed 2 and mix in flour mixture, ½ cup at a time.

Remove flat beater and attach dough hook. Set to Speed 2 and add butter one piece at a time. Continue kneading about 3 mins. Place dough in large bowl and cover with towel. Let rise about 1 ½ hours.

Prepare Cinnamon Butter:

Place brown sugar, flour, cinnamon salt and butter in clean mixer bowl. Remove dough hook and attach flat beater. Set to Speed 2 and mix until smooth.


Uncover dough and work out air bubbles. Turn dough onto a floured board and roll out into a large (approx. 18” x 11”) rectangle. Spread evenly with cinnamon butter, leaving 1” border. Then sprinkle with pecans.

Roll dough jelly-roll style and pinch ends together. Cut into 12 pieces and place on greased pan. Cover with plastic wrap and let rise for 45 to 60 mins.

Preheat oven to 350ºF.

Bake until rolls are golden brown, about 35 mins. Let cool in pan on rack for 5 mins. 6.

Prepare Glaze:

In small bowl, whisk together sugar and whipping cream. Add water as needed until glaze is reached. Drizzle glaze over warm rolls.

BEATERS YOU WILL NEED: FLAT BEATER, DOUGH HOOK, WHISK HOOK